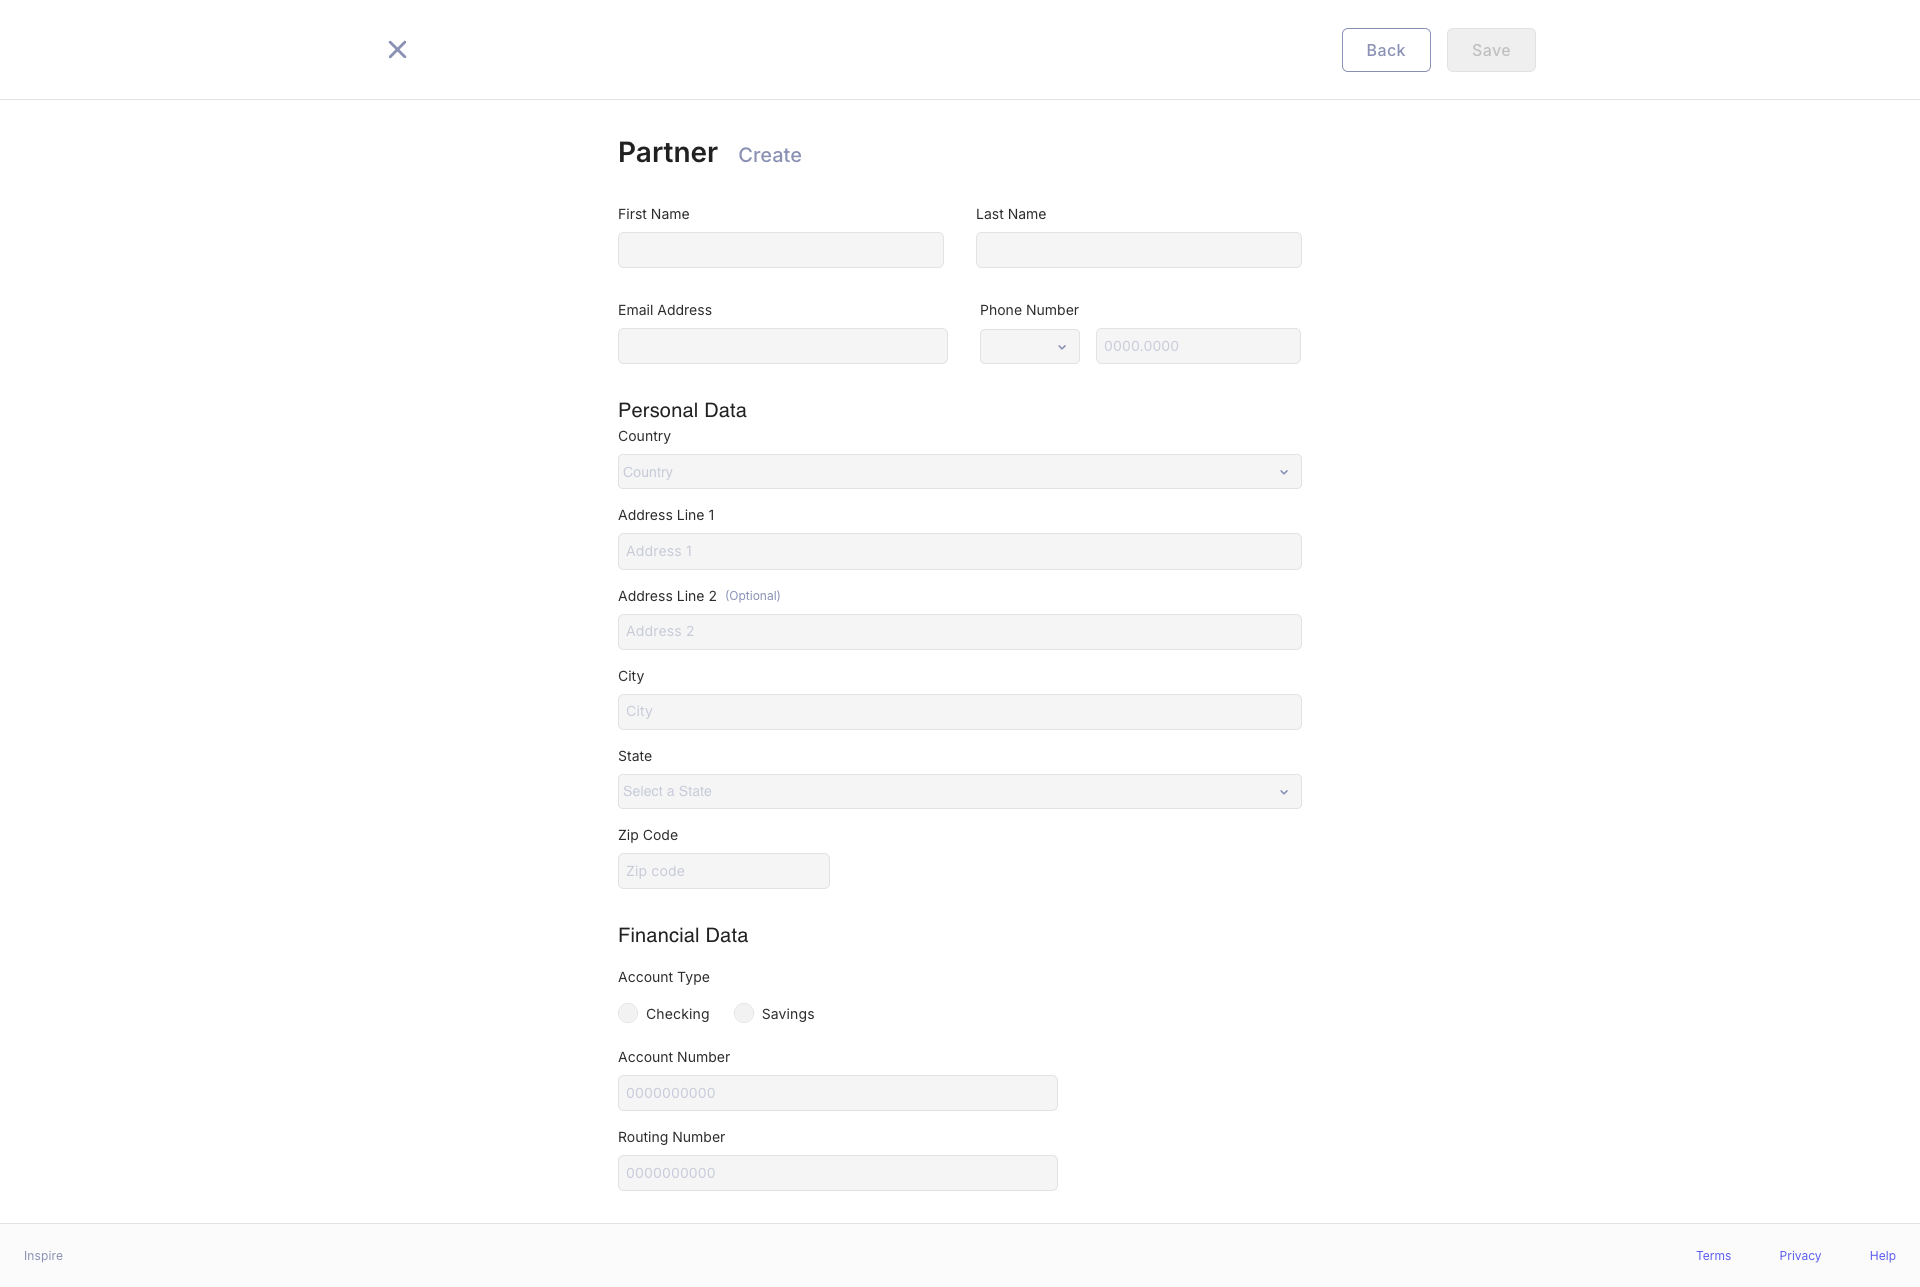
Creating Partner
Add New Partner
The "Add New Partner" screen allows Tenant Affiliate Management (TAM) users to add new partners with detailed personal, address, and account information.
Accessing the Screen
- This screen is accessible by clicking the "Create" button on the Partner List screen.
Screen Sections
Partner Information
- First Name: (required)
- Last Name: (required)
- Email Address: (required)
- Phone Number: (Country code and number) (required)
Personal Data
- Country: Selection from a list (required)
- Address Line 1: (required)
- Address Line 2: (optional)
- ZIP Code: (required)
- State: (required)
- City: (required)
Financial Data
-
Account Type (For US):
- Checking or Savings
- Account Number
- Routing Number
- Checking or Savings
-
Account Type (For BR):
- CPF or CNPJ: (required)
- Bank: List of banks (required)
- Agency: (required)
- Account Number: (required)
- Pix Key: (optional)
Navigation
- Save: Submits the information and creates the partner.
- Back: Discards changes and returns to the Partner List screen.
Behavior and Validation
- Upon entering all required information and clicking "Save," the new partner is created.
- If required fields are left blank, error messages will prompt the user to complete the form.
- The "Save" button is enabled when all required fields are filled:
- First Name
- Last Name
- Email Address
- Phone Number
- Country
- Address Line 1
- City
- State
- Zip Code
- For Brazil:
- Bank
- Agency
- Account Number
- CNPJ or CPF
- If Address Line 2 or Pix Key fields are not filled, the "Save" button remains enabled as long as all other required fields are completed.
- Clicking "Save" submits the form, records the information, and redirects the user to the Partner List screen with a message: "Partner created successfully."
- The new partner's status is set to "Invited" until they confirm the invitation and create a password.
- Clicking "Back" abandons all input and returns to the Partner List screen.
Updated 9 months ago