Updating a Payment Link
Editing a Payment Link
This guide walks you through the process of editing an existing payment link in the Customer Portal.
Accessing the Edit Page
-
Navigate to the list of payment links.
-
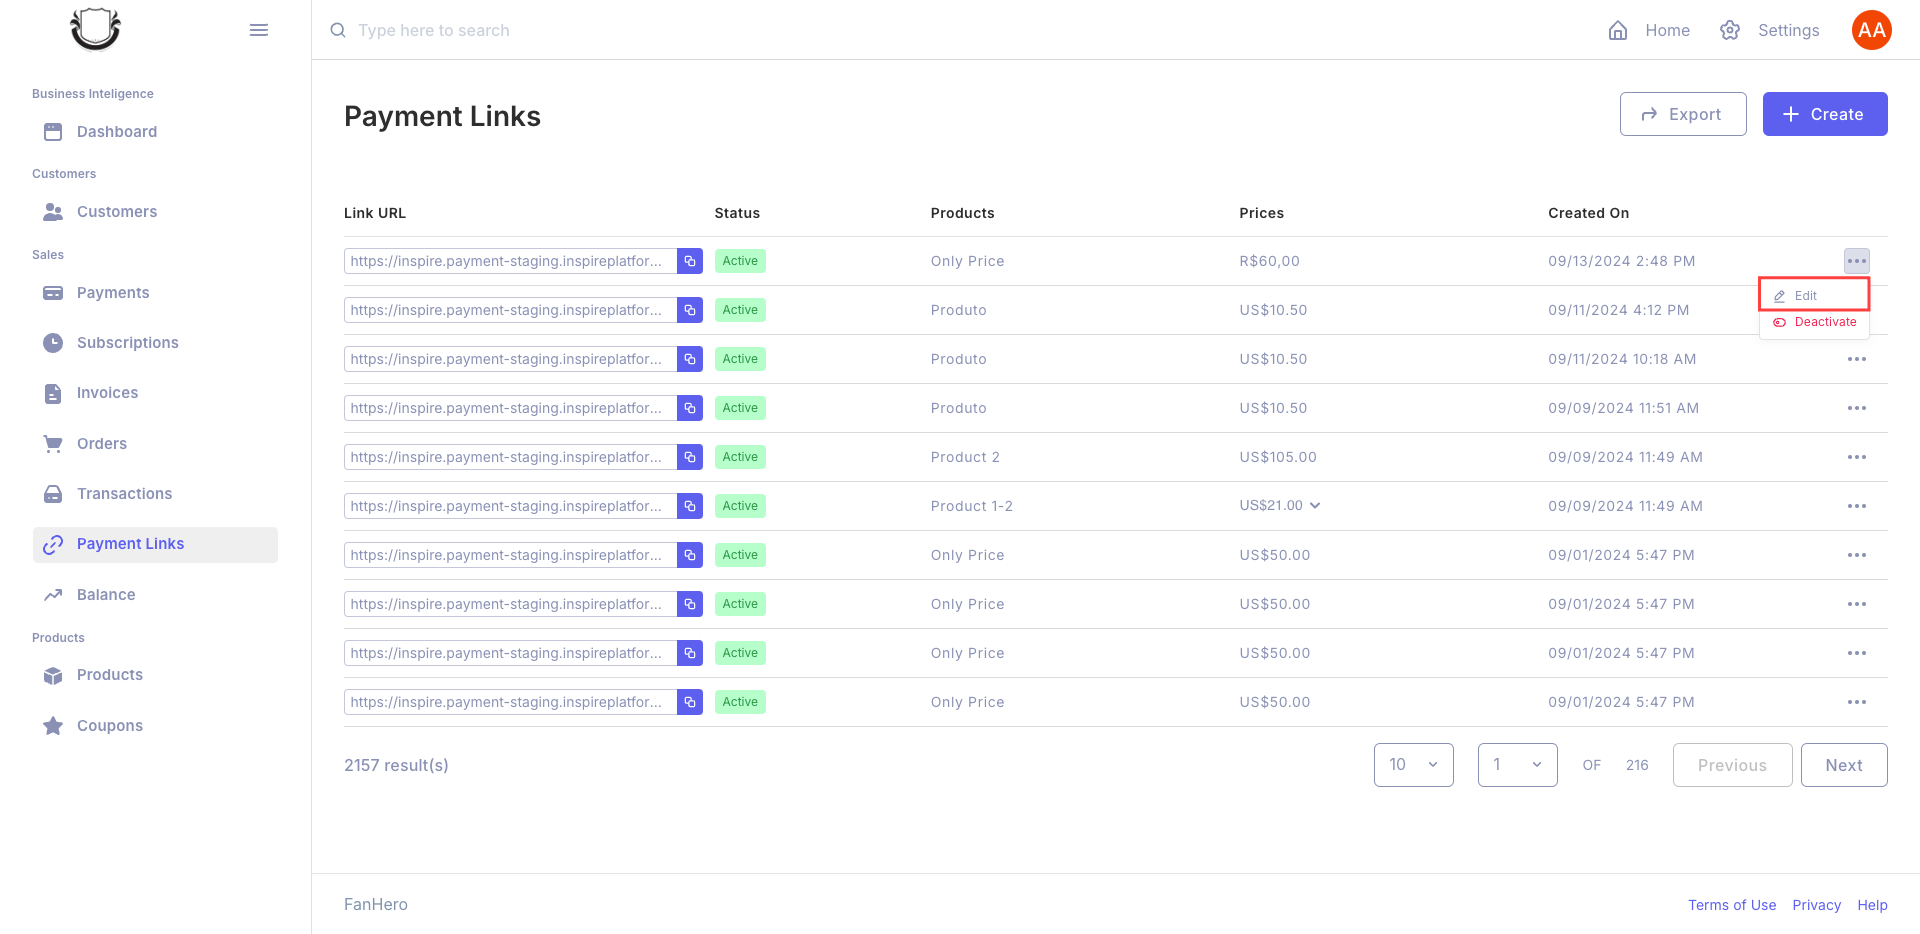
Find the payment link you want to edit.
-
Click the "Edit link" option next to the desired payment link.
You'll be redirected to the payment link editing page.
Editing Payment Link Details
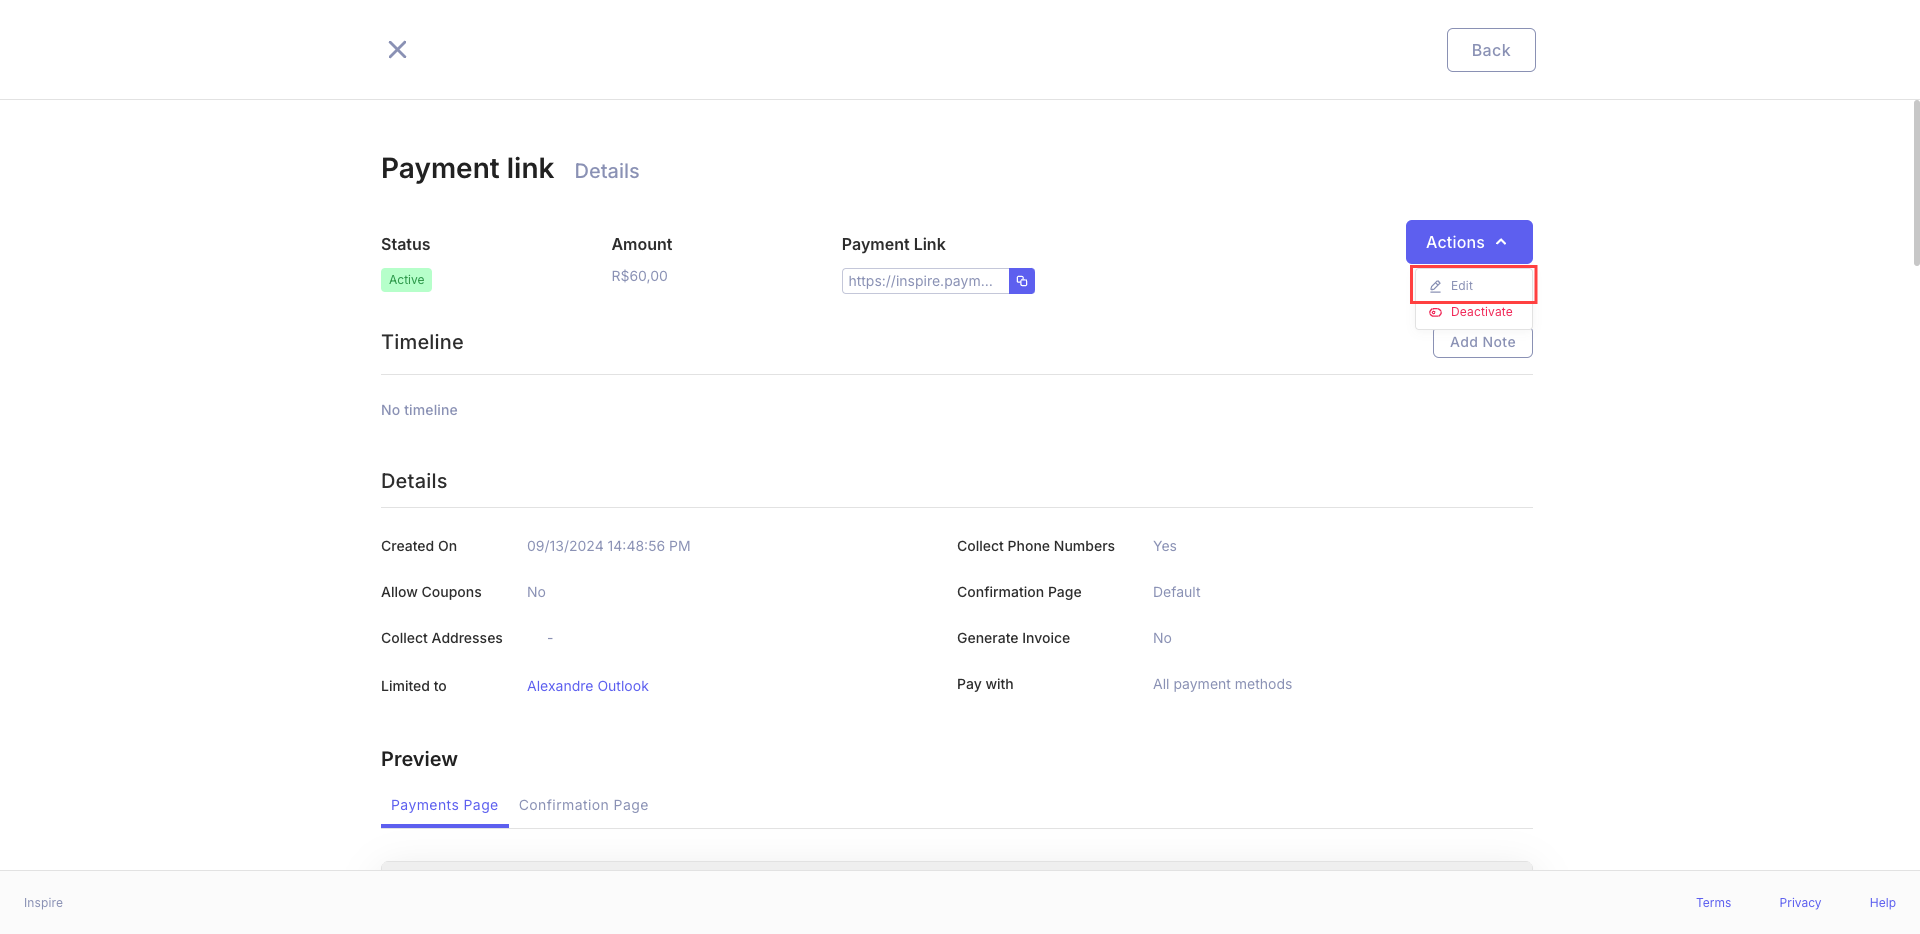
- After clicking in a Payment Link, the Payment Link detail screen will be shown.
- Clicking on Button Actions the option Edit will be available.
- Click the "Edit link" option next to the desired payment link.
Payment Page Configuration
Product Information
- Product: The name of the product is displayed here. In this example, it's "Produto".
- Price: The price of the product is shown. Here, it's set to $10.50.
NoteThe product and price are pre-filled based on your product settings. To change these, you may need to edit the product details separately.
Options
You can customize the payment link with the following options:
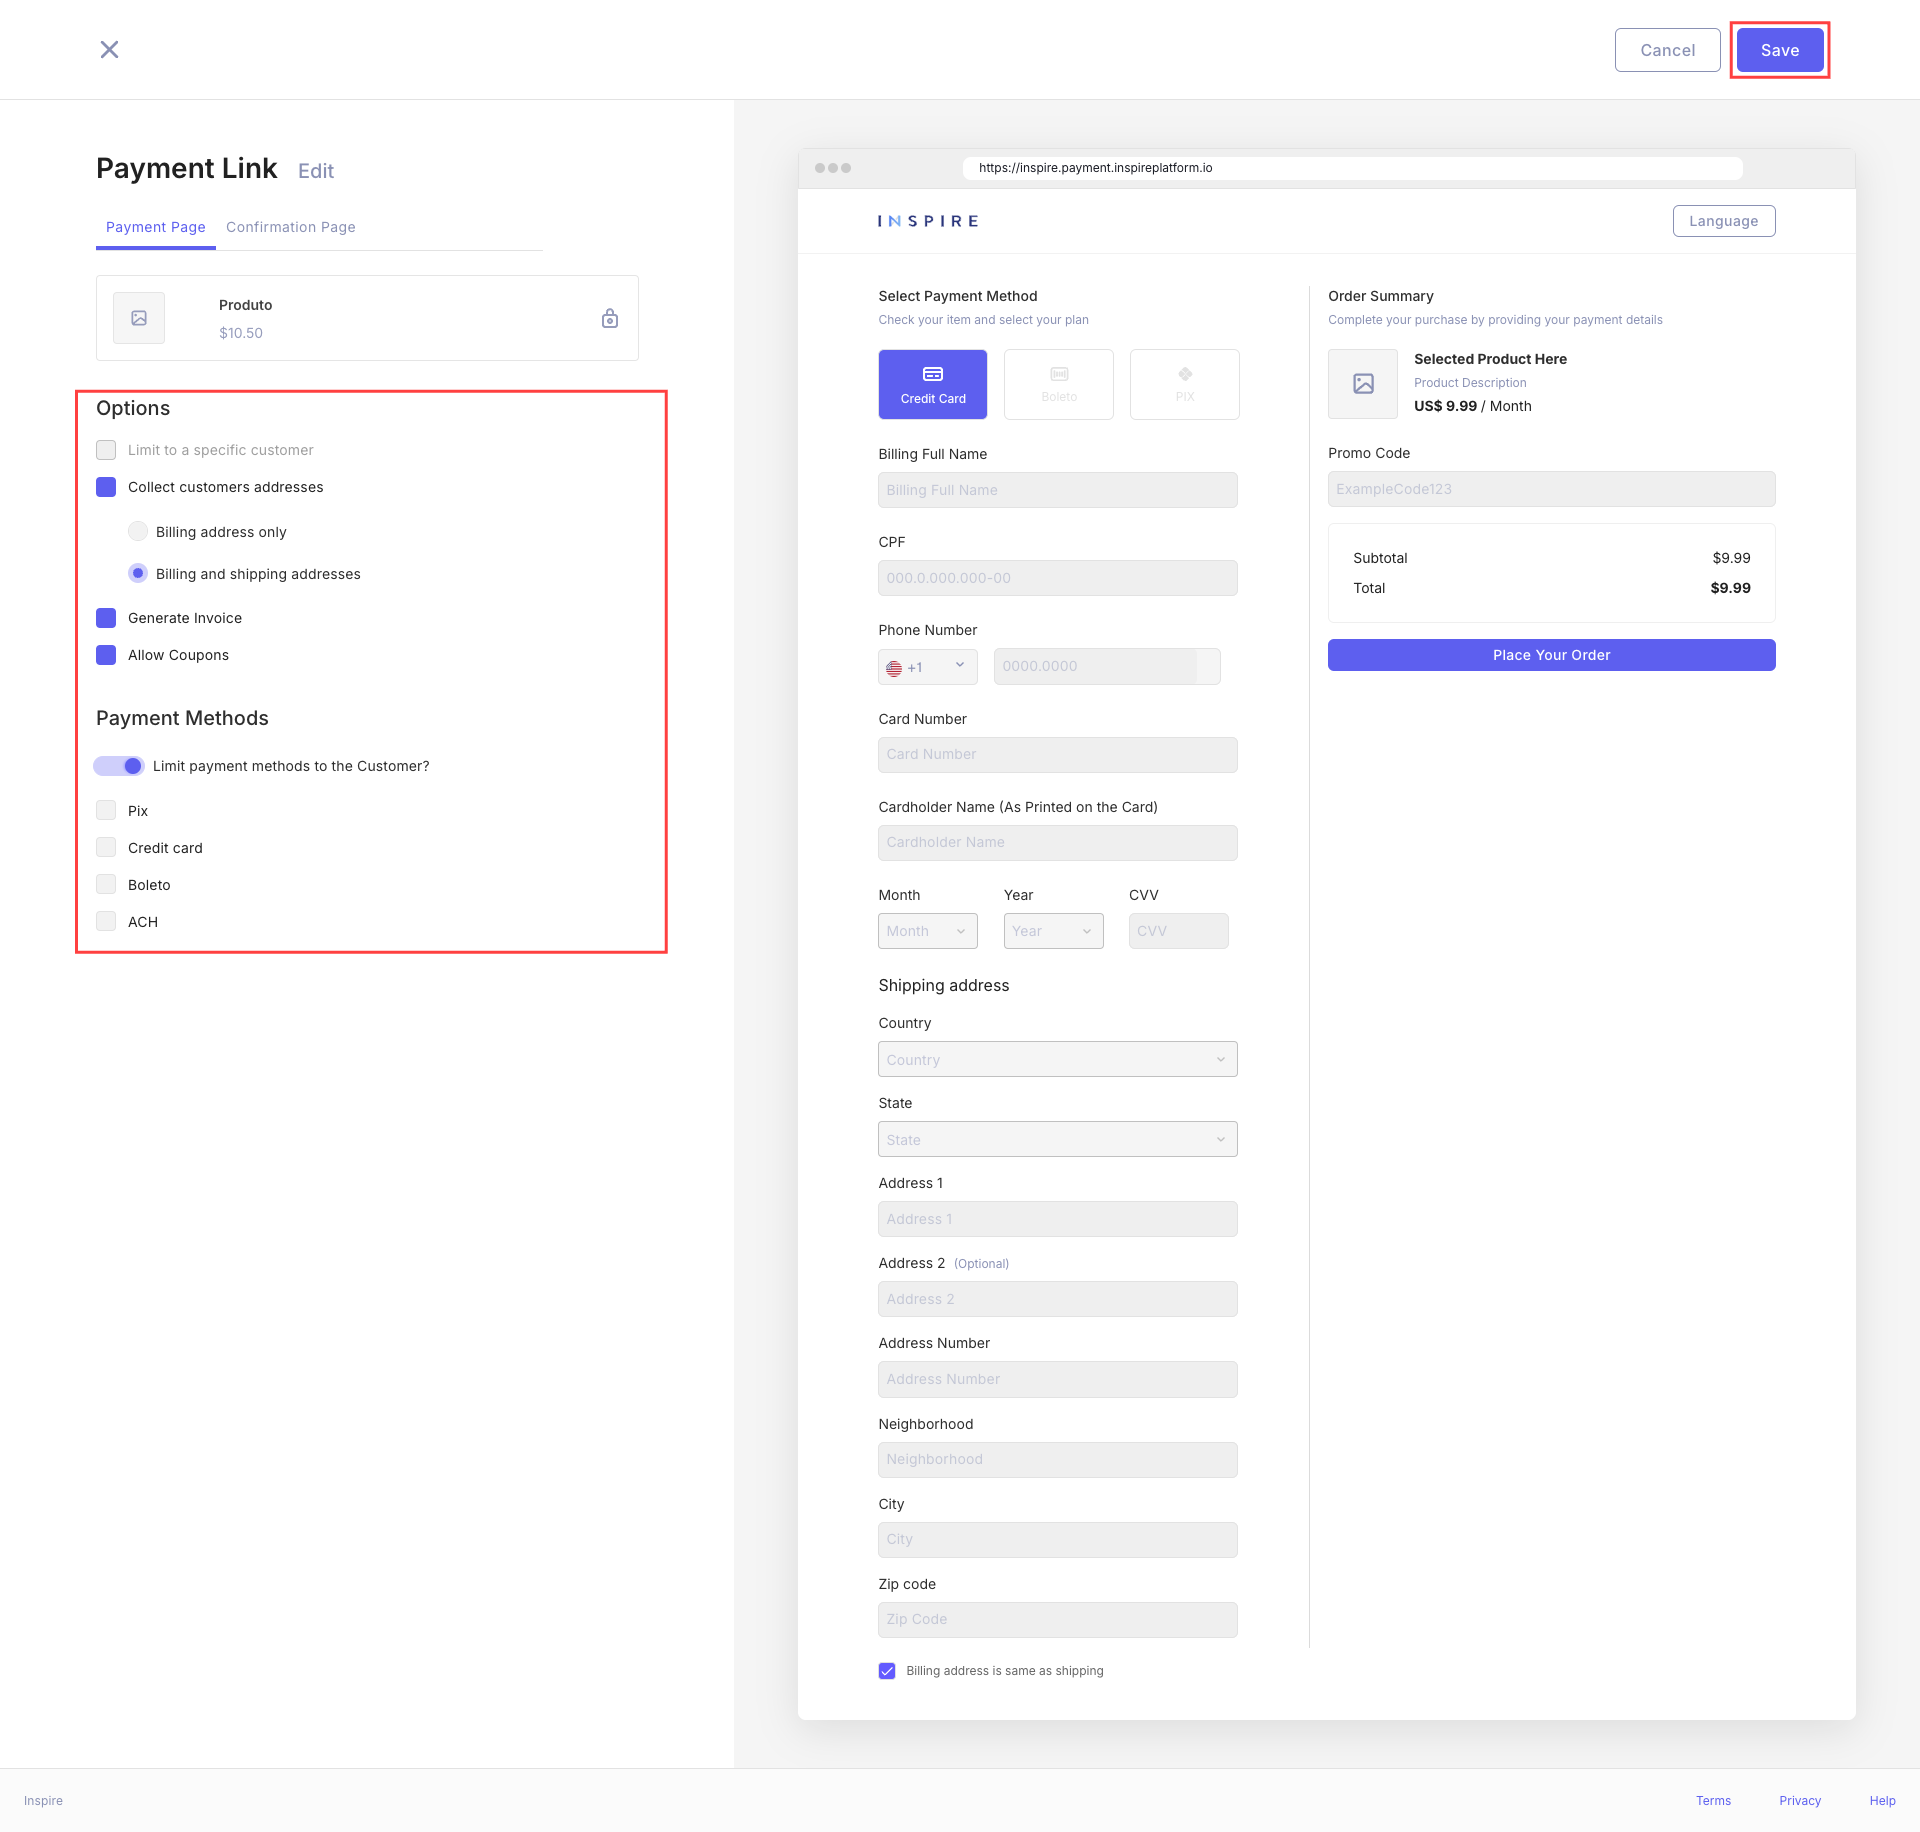
- Limit to a specific customer: Toggle this on if you want to restrict the payment link to a particular customer.
- Collect customer's addresses: Enable this to gather customer address information.
- Choose between "Billing address only" or "Billing and shipping addresses".
- Generate invoice: Turn this on if you want to automatically generate an invoice for each transaction.
- Allow Coupons: Enable this option to accept coupon codes on the payment page.
Payment Methods
- Limit payment methods to the Customer?: Toggle this on to restrict available payment methods.
- Available payment methods include:
- Pix
- Credit card
- Boleto
- ACH
Confirmation Page Configuration
To configure the confirmation page, switch to the "Confirmation Page" tab in the Payment Link settings.
Options
You have three main options for the confirmation page:
-
Show confirmation page: This is the default option. It displays a standard confirmation message after a successful payment.
-
Replace default with custom message: Enable this to use a personalized confirmation message.
- If selected, a text field will appear where you can enter your custom message.
-
Don't show confirmation page: Select this if you don't want to show a confirmation page.
- If chosen, you must provide a redirect URL in the "Redirect customer to your website" field.
Redirect Option
- Redirect customer to your website: If you choose not to show a confirmation page, enter the URL where customers should be redirected after payment.
Confirmation Page Preview
The right side of the screen shows a preview of the confirmation page. This includes:
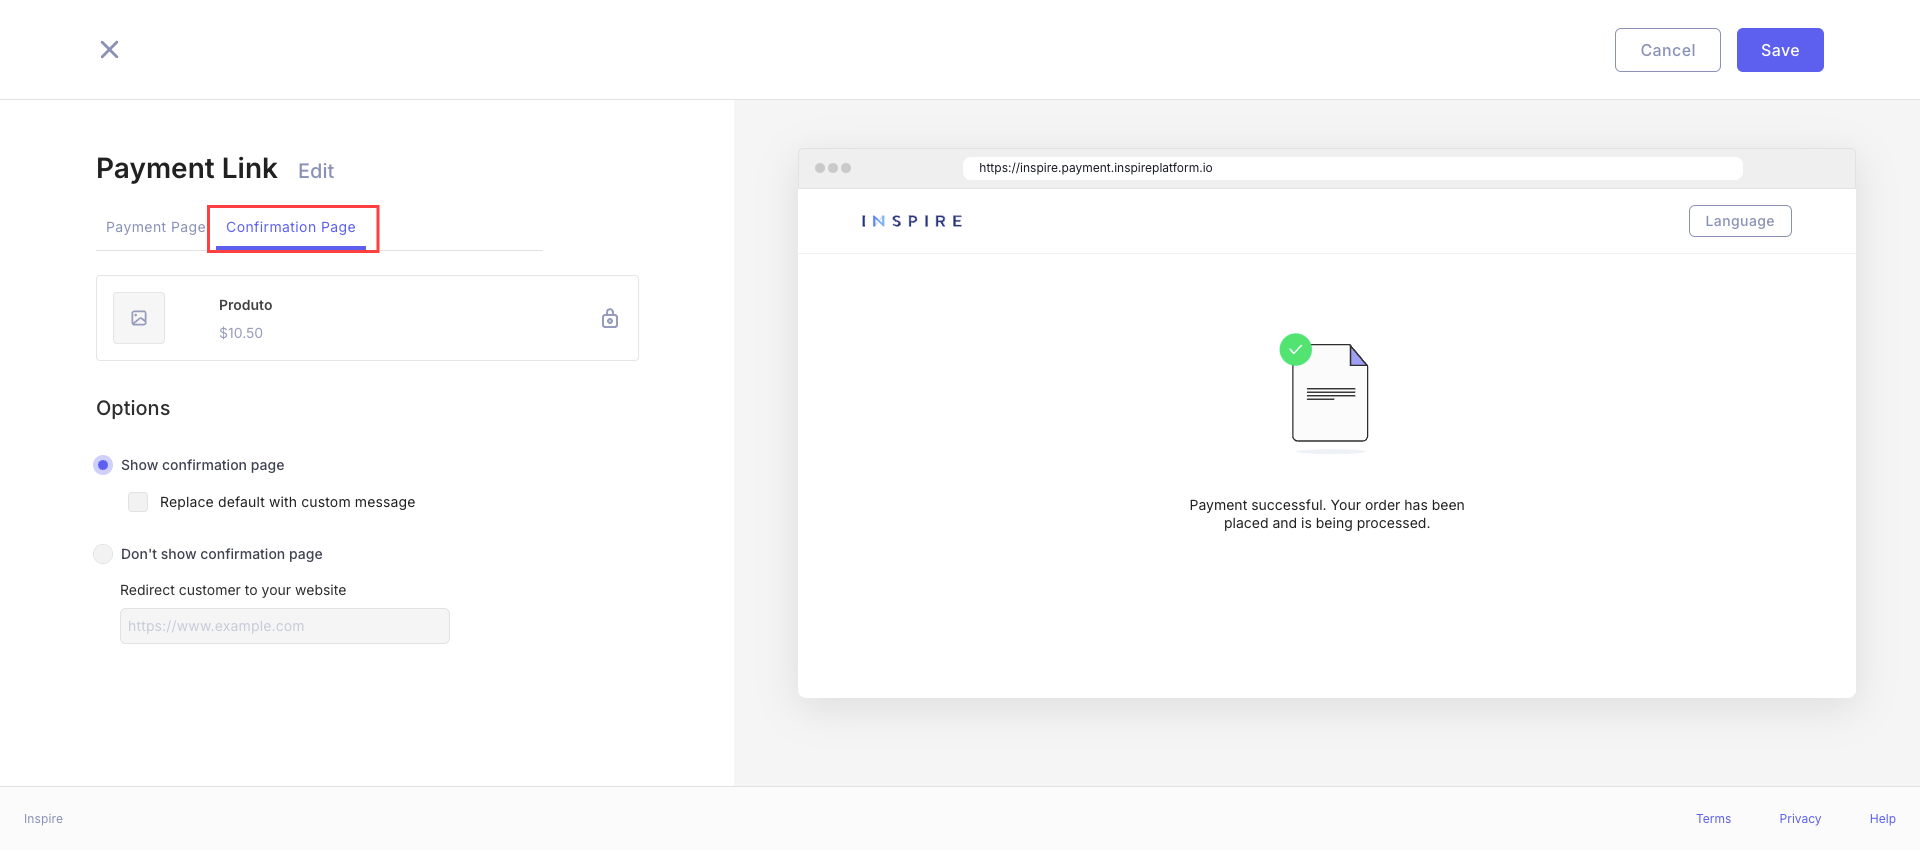
- INSPIRE logo: Your brand logo at the top of the page.
- Language selector: Allows customers to choose their preferred language.
- Confirmation message: A standard message stating "Payment successful. Your order has been placed and is being processed."
- Confirmation icon: A green checkmark with a document icon, visually confirming the successful transaction.
Saving Your Changes
Once you've configured your payment link and confirmation page settings:
- Review all options to ensure they meet your requirements.
- Click the "Save" button in the top right corner to apply your changes.
ImportantIf you wish to discard your changes, click the "Cancel" button instead of "Save".
Best Practices
- Use clear and concise language in your custom confirmation message if you choose to use one.
- If redirecting customers to your website, ensure the landing page provides relevant post-purchase information or next steps.
- Regularly review and update your confirmation page to align with your brand voice and customer experience goals.
- Test the payment flow, including the confirmation page, to ensure a smooth customer experience.
Updated 9 months ago