Edit Product Details
Editing a Product
This guide walks you through the process of editing an existing product in the system.
Accessing the Edit Product Screen
To edit a product:
- Navigate to the product list.
- Find the product you wish to edit.
- Click on the "Edit" or "Edit Product" button associated with that product.
Product Information
The edit screen is divided into two main sections: Product Information and Price Information.
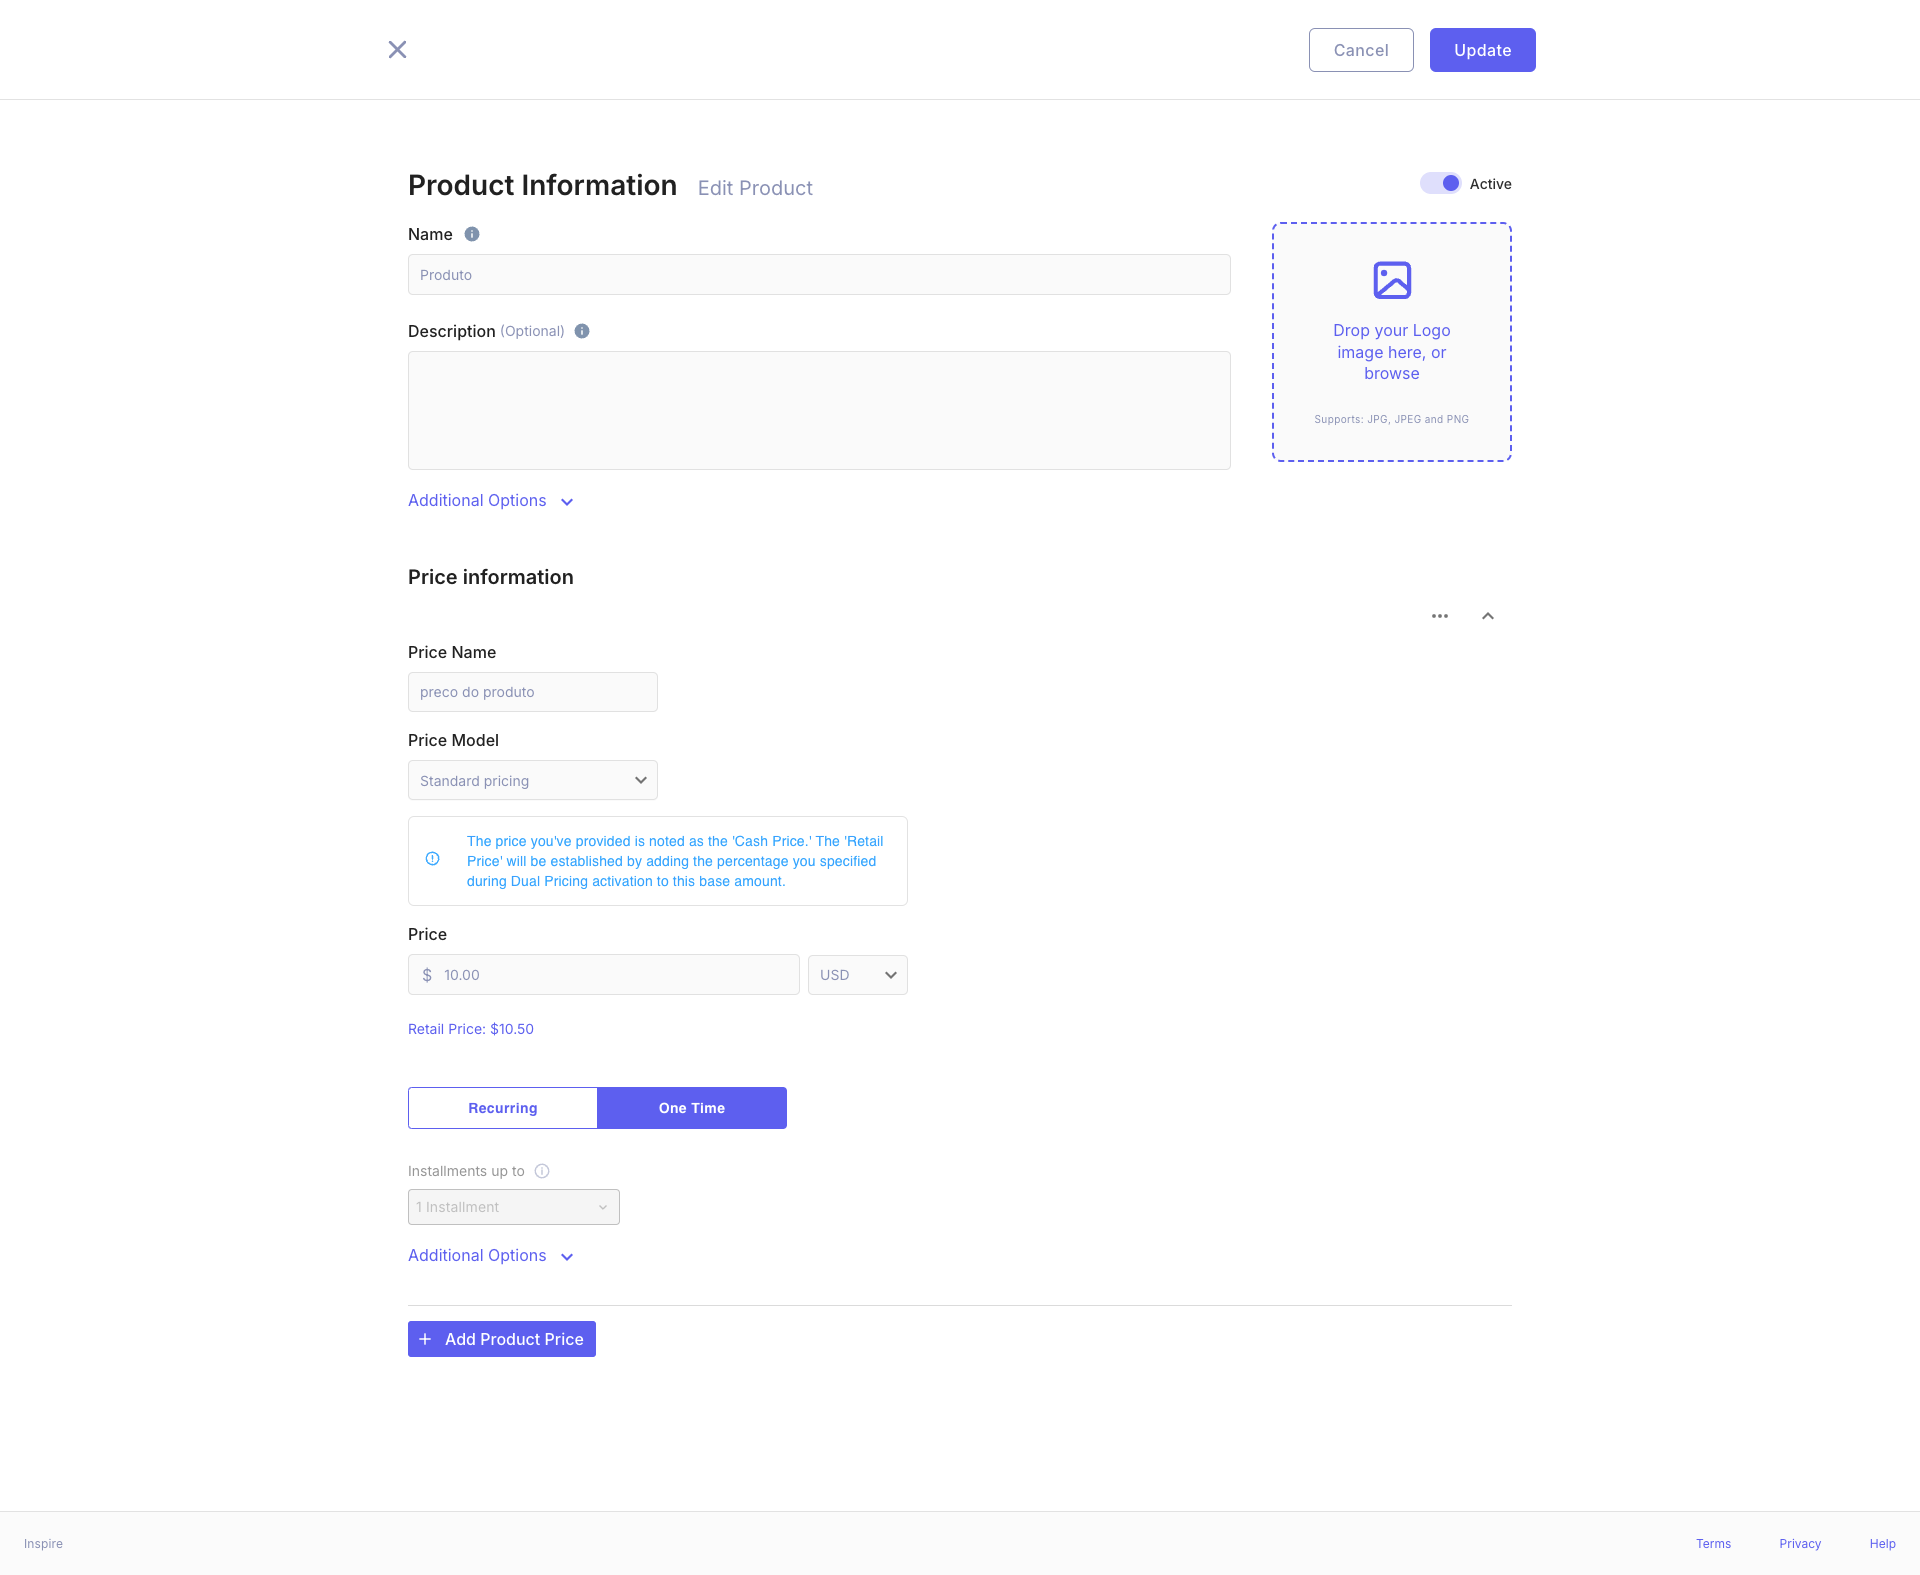
Product Information
In this section, you can modify the following details:
- Name: Enter the product name.
- Description (Optional): Provide a detailed description of the product.
- Logo: Upload or change the product logo by dropping an image or clicking to browse. Supported formats are JPG, JPEG, and PNG.
NoteThe product status is displayed at the top right. Ensure it's set to "Active" if you want the product to be available.
Additional Options
Click on "Additional Options" to reveal more fields for customization. These may include attributes like product category, tags, or custom fields.
Price Information
In this section, you can set or modify the pricing details for your product:
-
Price Name: Enter a name for this specific price point (e.g., "Standard Plan", "Premium Tier").
-
Price Model: Select the pricing model from the dropdown. The default is "Standard pricing".
-
Price: Enter the base price for the product.
- Currency can be selected from the dropdown (default is USD).
- The system will automatically calculate and display the Retail Price based on your settings.
-
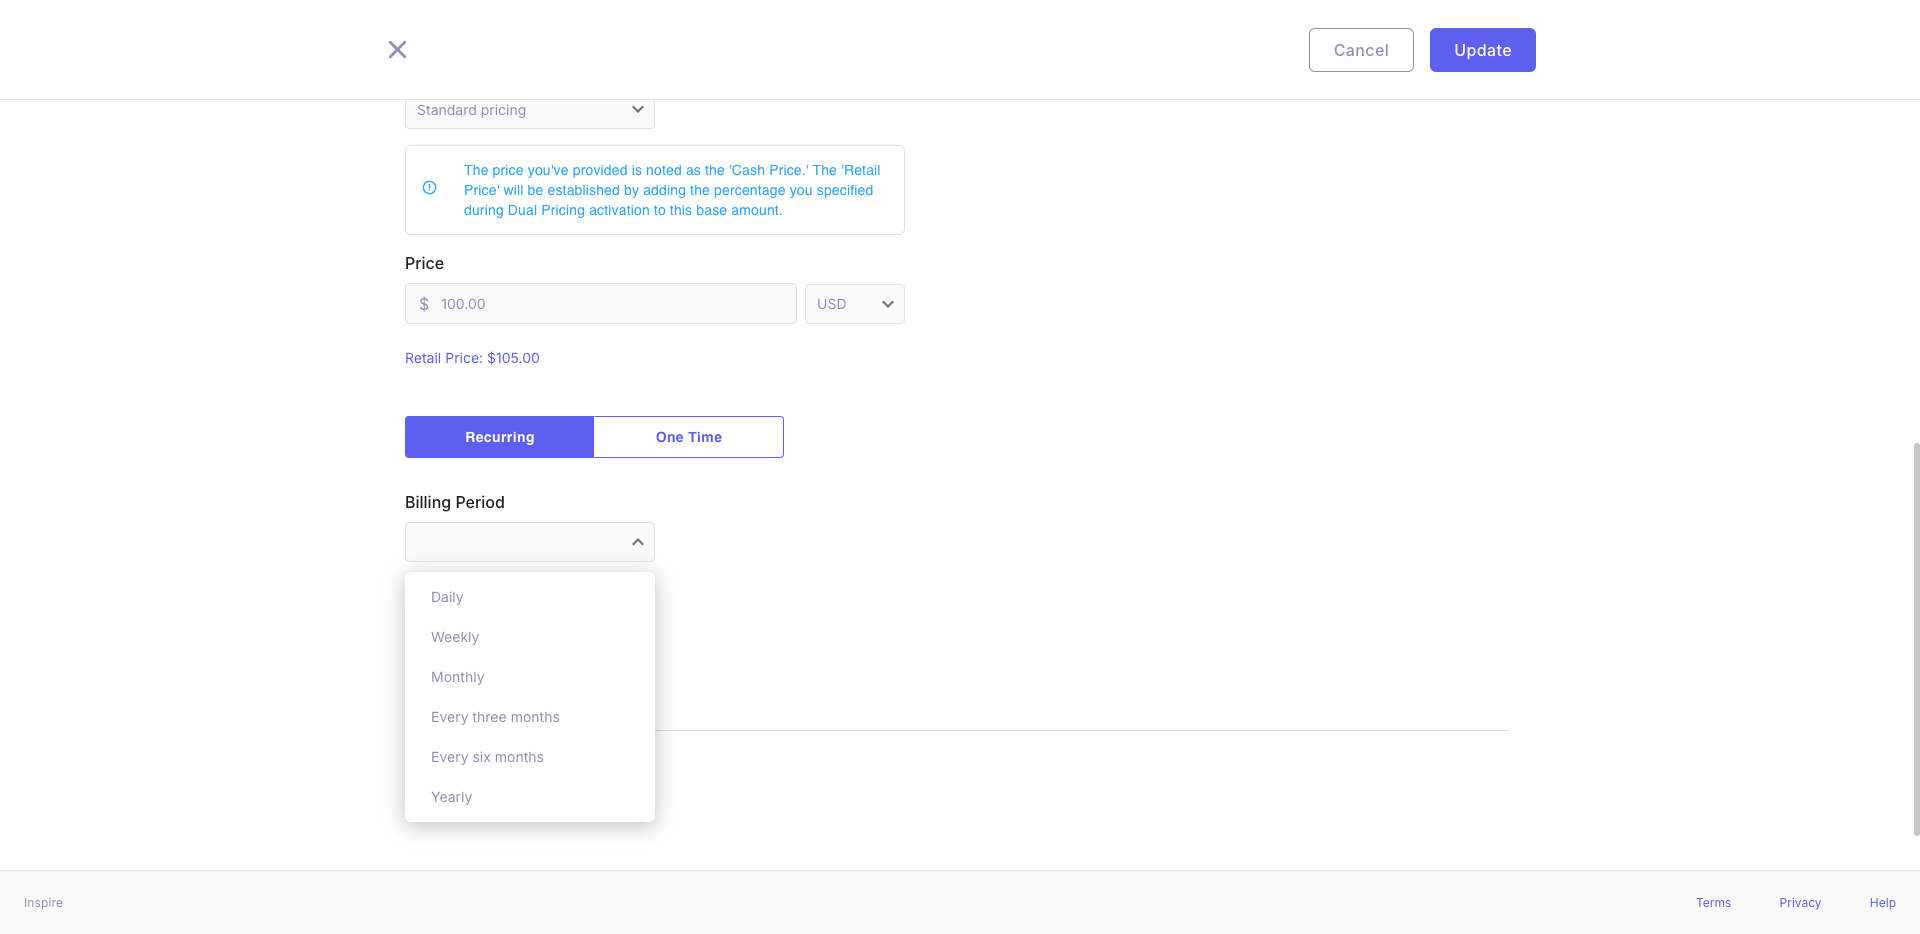
Billing Type: Choose between "Recurring" or "One Time" billing.
- In case of "Recurring" has been chosen the field "Billing Period" must be selected.
-
Installments: If applicable, select the number of installments allowed for payment.
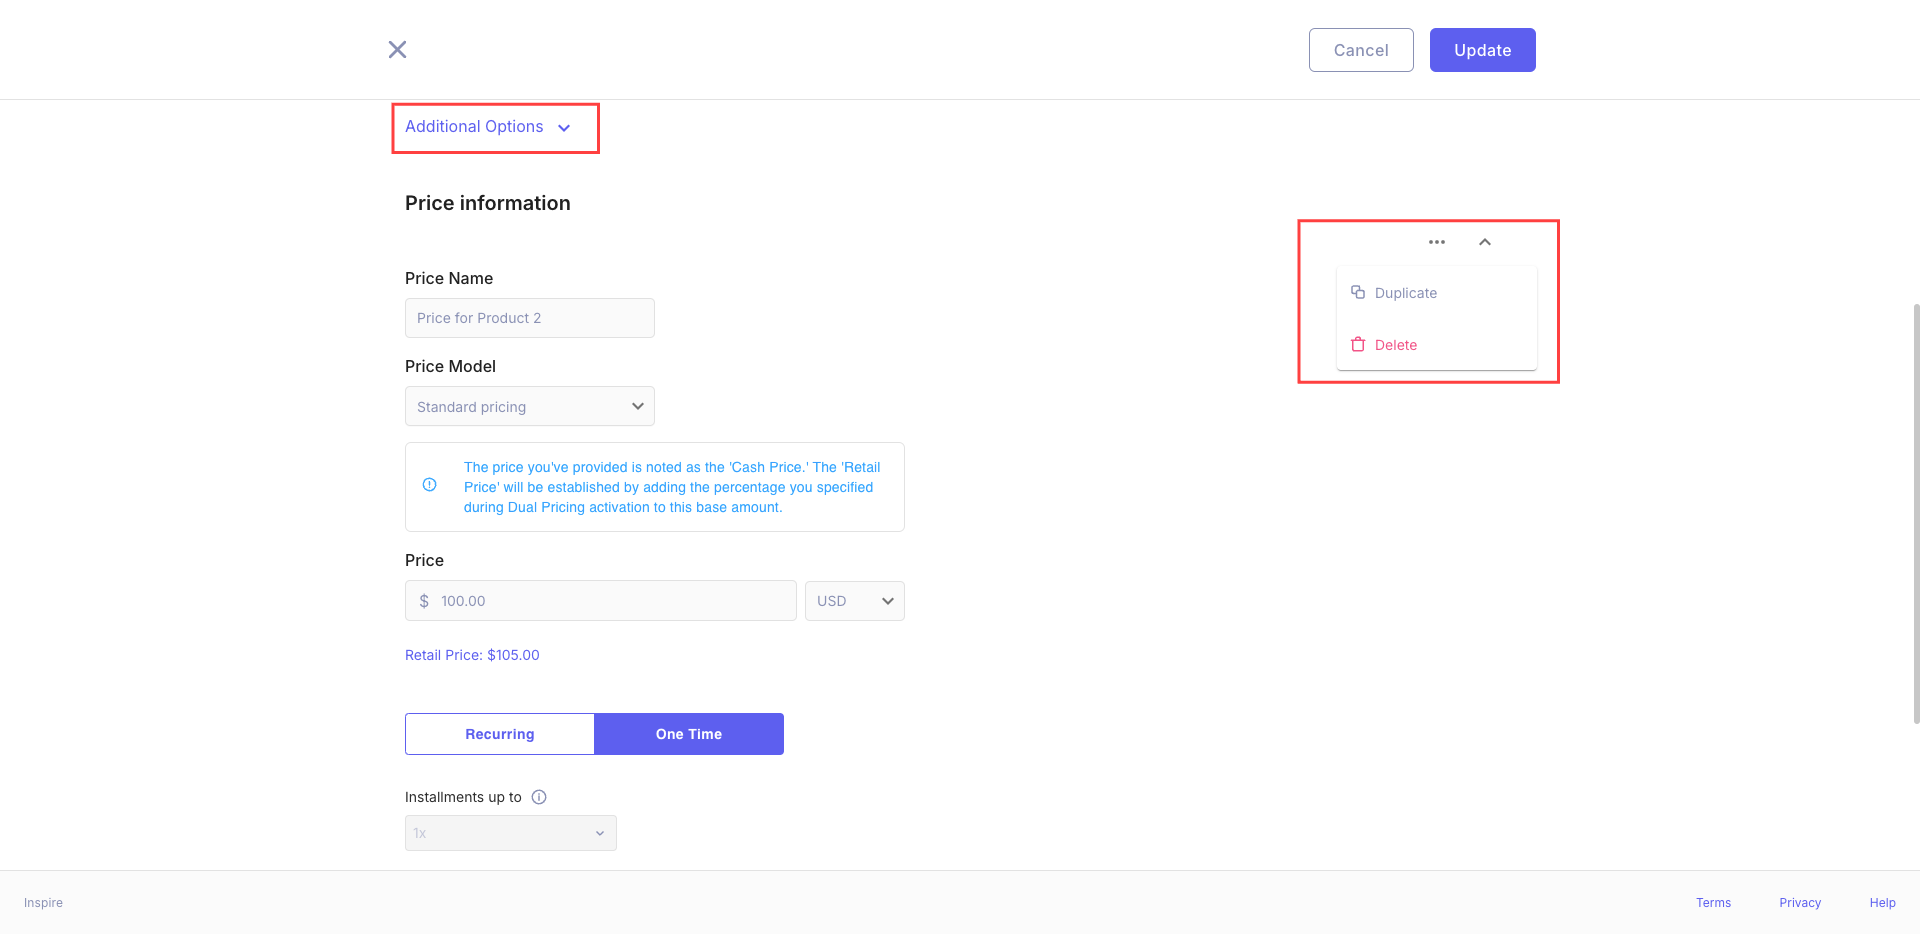
Additional Price Options
Click on "Additional Options" under the price section to reveal more advanced pricing settings.
Adding Multiple Price Points
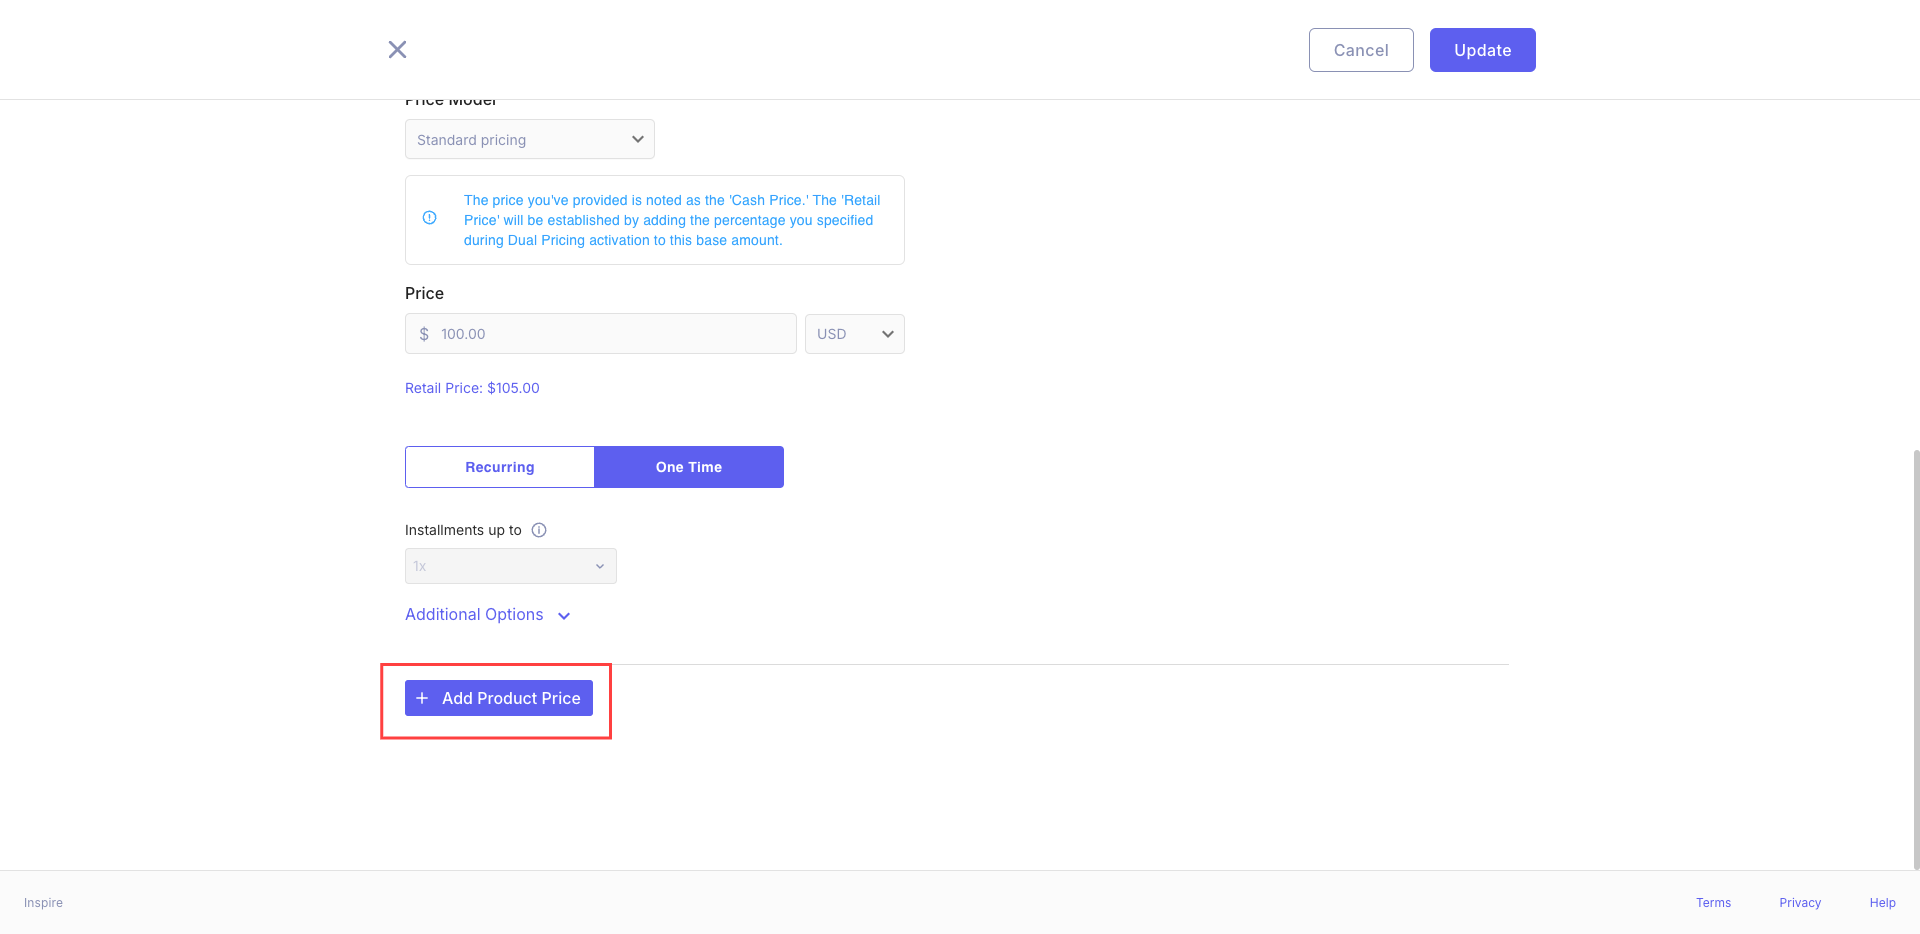
If your product has multiple price points or tiers:
- Fill out the details for the first price point.
- Click the "+ Add Product Price" button at the bottom of the form or the three points menu on right side.
- A new price information section will appear where you can enter details for the additional price point.
Saving Your Changes
Once you've made all necessary edits:
- Review all the information to ensure accuracy.
- Click the "Update" button at the top right of the screen to save your changes.
If you wish to discard your changes, click "Cancel" instead.
ImportantMake sure to click "Update" to save your changes. Navigating away from this page without updating will result in loss of your edits.
Additional Price Management Options
- Delete a price: Option available in the detailed price view.
- Create a new price: Option to add another price to the product.
Important Notes
- A product must have at least one pricing.
- The "Next" button is enabled only when there are more prices to show beyond the current page.
- The "Previous" button is enabled when you're not on the first page of prices.
Best Practices
- Regularly review and update pricing to ensure it reflects current market conditions.
- Use clear and consistent naming conventions for API IDs to facilitate integration.
- Monitor the number of subscriptions for each price to understand popularity and inform pricing strategies.
- Utilize the filtering and search features to quickly find specific prices in large catalogs.
- Keep product names clear and descriptive.
- Use high-quality images for the product logo.
- Provide detailed descriptions to help customers understand your product.
- Regularly review and update product information to ensure it remains accurate and current.
By following these guidelines, you can effectively manage your product pricing, ensuring that all information is accurate, up-to-date, and easily accessible.
Updated 9 months ago